
This isn’t a sponsored blog, as using the Glucose Monitoring Unit is something I’ve wanted to trial for a while now, particularly as I prepare for Race Across America. So I bit the bullet, purchased and as such here is a bit more about the what, why’s and my conclusions after a month of using the sensors.
The challenge of fuelling
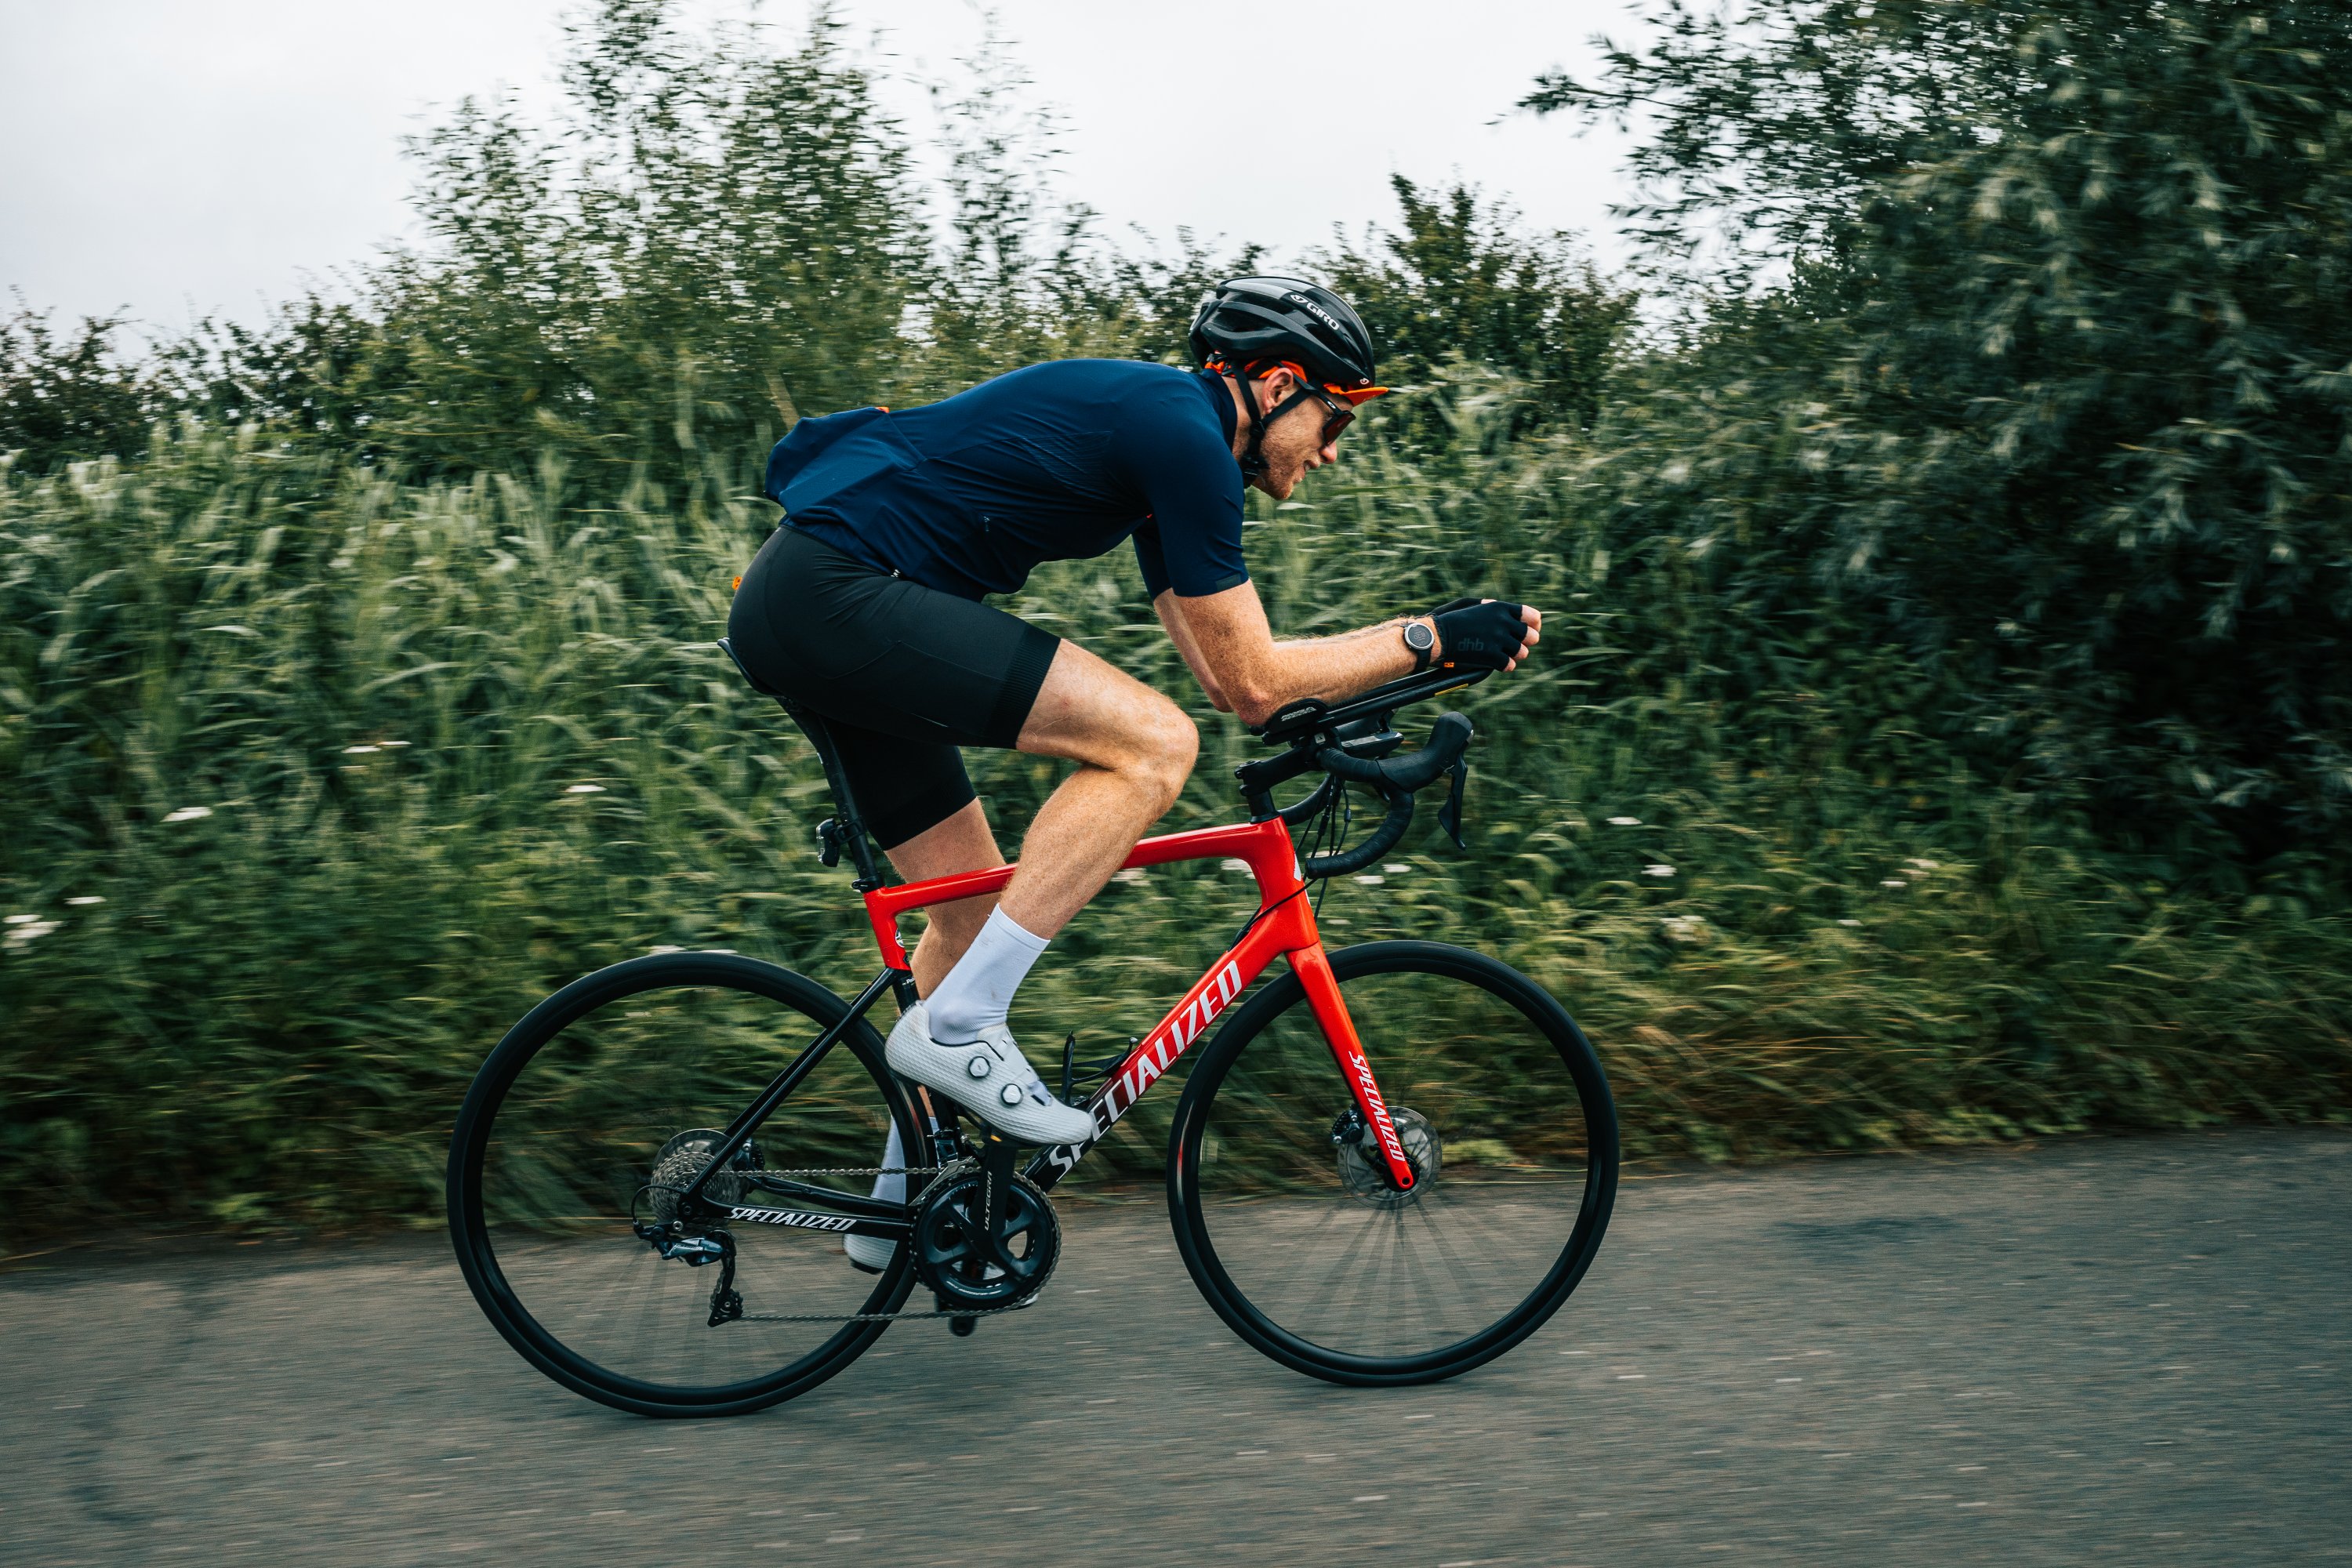
As with every aspect of life, what works for one rarely works for another and the same can be said for what we eat and how we, as athletes, fuel for our training and events. Trying stuff, practicing your fuelling strategy, is really the only way to something that works for you.
Glucose is the body’s primary source of fuel for exercise – after you eat carbohydrates, your body breaks it down to glucose, which then enters your bloodstream. Your body either uses what is needs for energy or anything over and above that is stored as glycogen by your liver. So, knowing your body’s glucose levels in real-time means you can see exactly how your nutrition is affecting you at rest and in training. In theory, this allows you to see how different fuels affect you and how you can avoid glucose peaks and troughs during exercise so as to avoid the dreaded bonk.
The pitch therefore is that the Abbot Libre glucose sensor and Supersapiens app work together to analyse your glucose levels at rest, during events and workouts and in recovery to ensure you perform at your best.
The Supersapiens App
Before you crack on to opening your hardware – download the app on to your phone and get it set up. Helpfully there are a bunch of how to videos on there about the hardware and how to apply the sensor.
I’m not going to go in to huge detail about the app in this blog, but some of the key things you need to know are;
- Measure – this is your Live glucose data screen, you can switch between Perform, Recover and Events across the top of the app screen.
- Events – this gives you your specific Glucose Score for a training session or race and as such is a key screen to be using. It show a huge range of information about how your glucose levels changed pre and during the event.
- Learn – you’ve got a ton of how to guides and videos here that take you through the sensor, the app and how to get the most from them in your training
- Profile – this is where you add your personal data like height, weight, chosen sports etc. As well as setting the app up with the various integrations and settings.
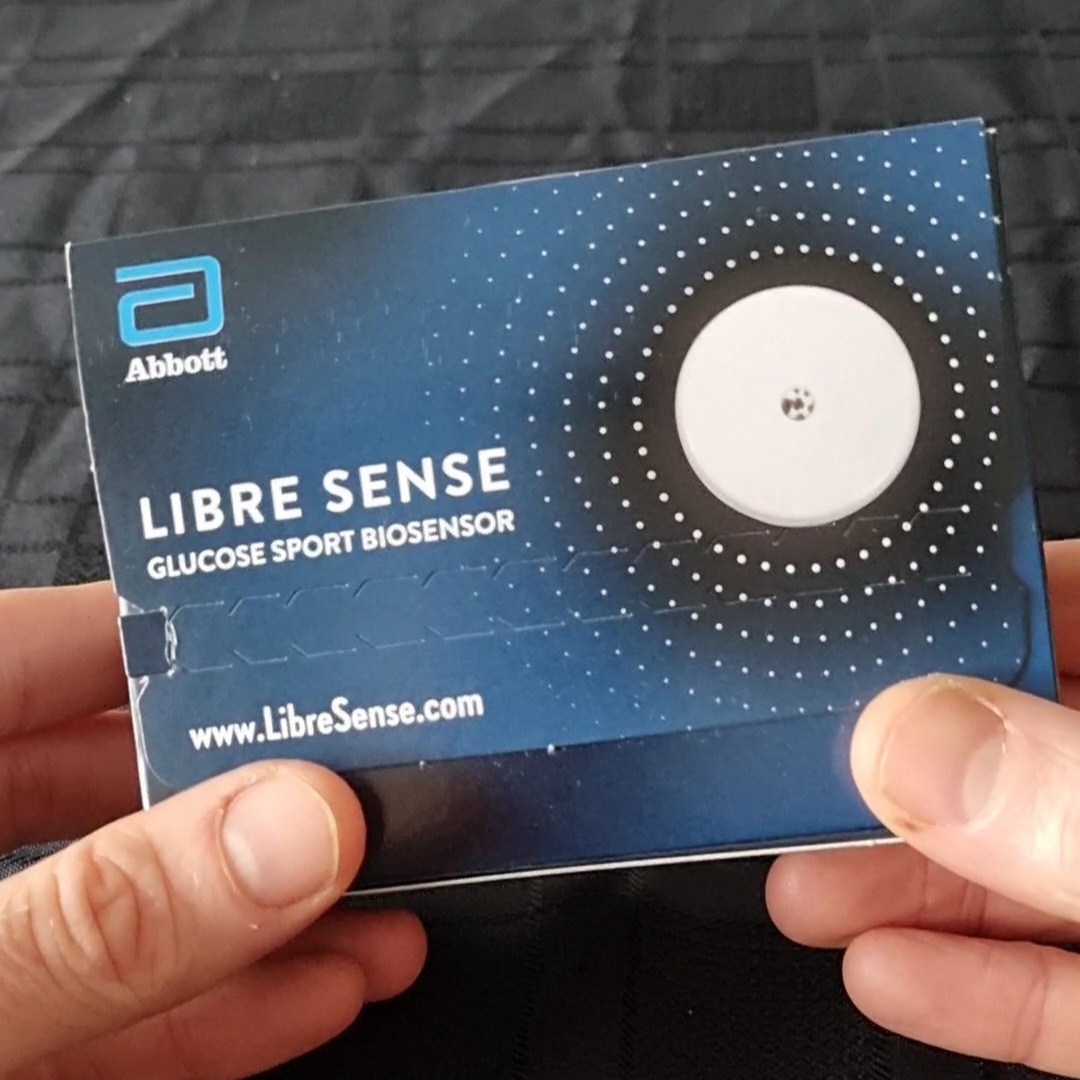
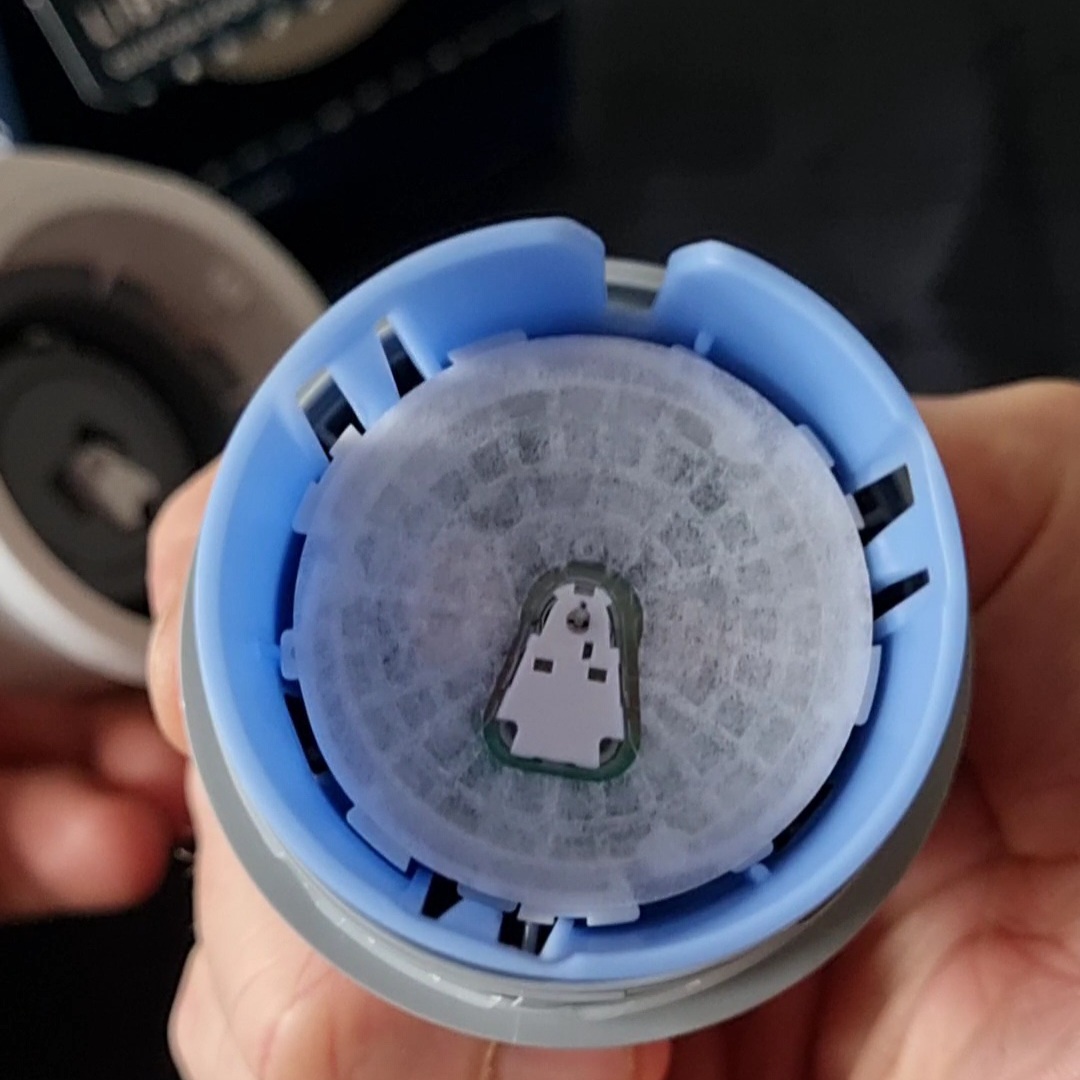
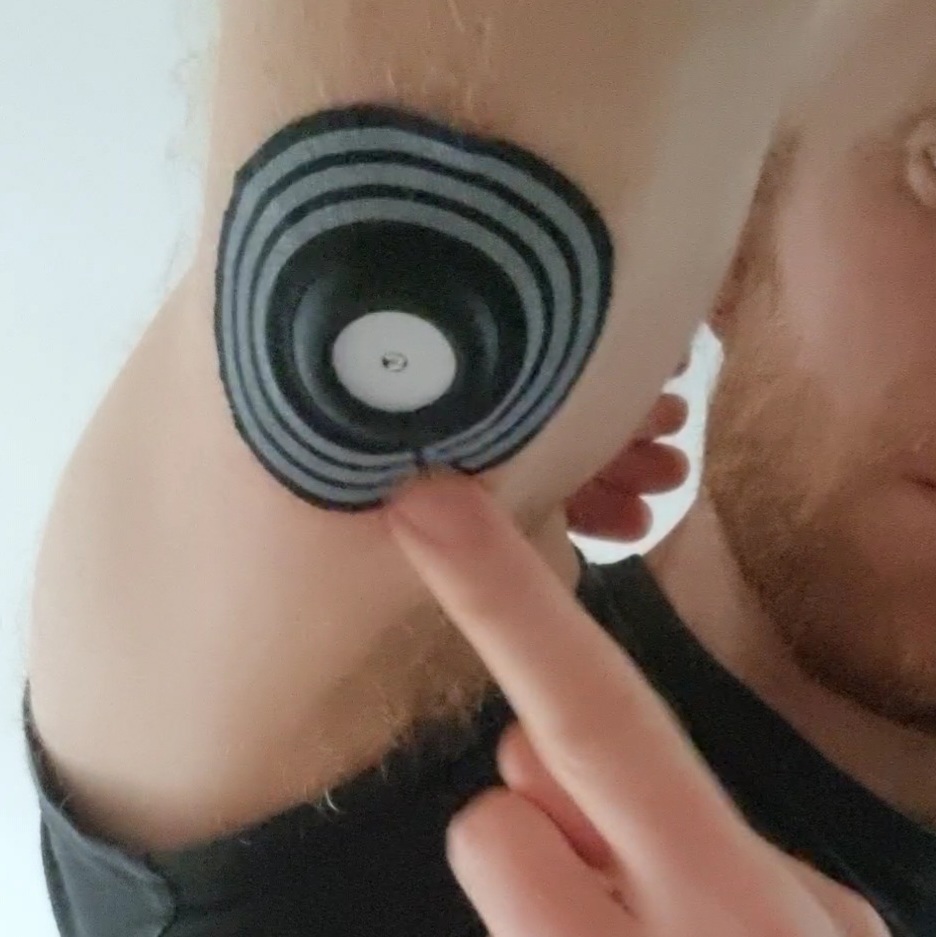
The Bio Sensor
Once opened and applied / inserted to your arm (don’t worry it is a mere scratch and then becomes largely unnoticeable) you need to wait 60mins for your sensor to warm up and start pushing data to the app. Once live you can monitor your glucose levels in real time. This means you will be able to know how and when to fuel before, during and after training sessions and thus know how to fuel race day to give your very best performance.
What does the data tell you?
Learning what foods give you the biggest and quickest spikes and those that give you a good energy level for the longest period. You can also see which foods enter your energy system quickly which is great when you are mid training session.
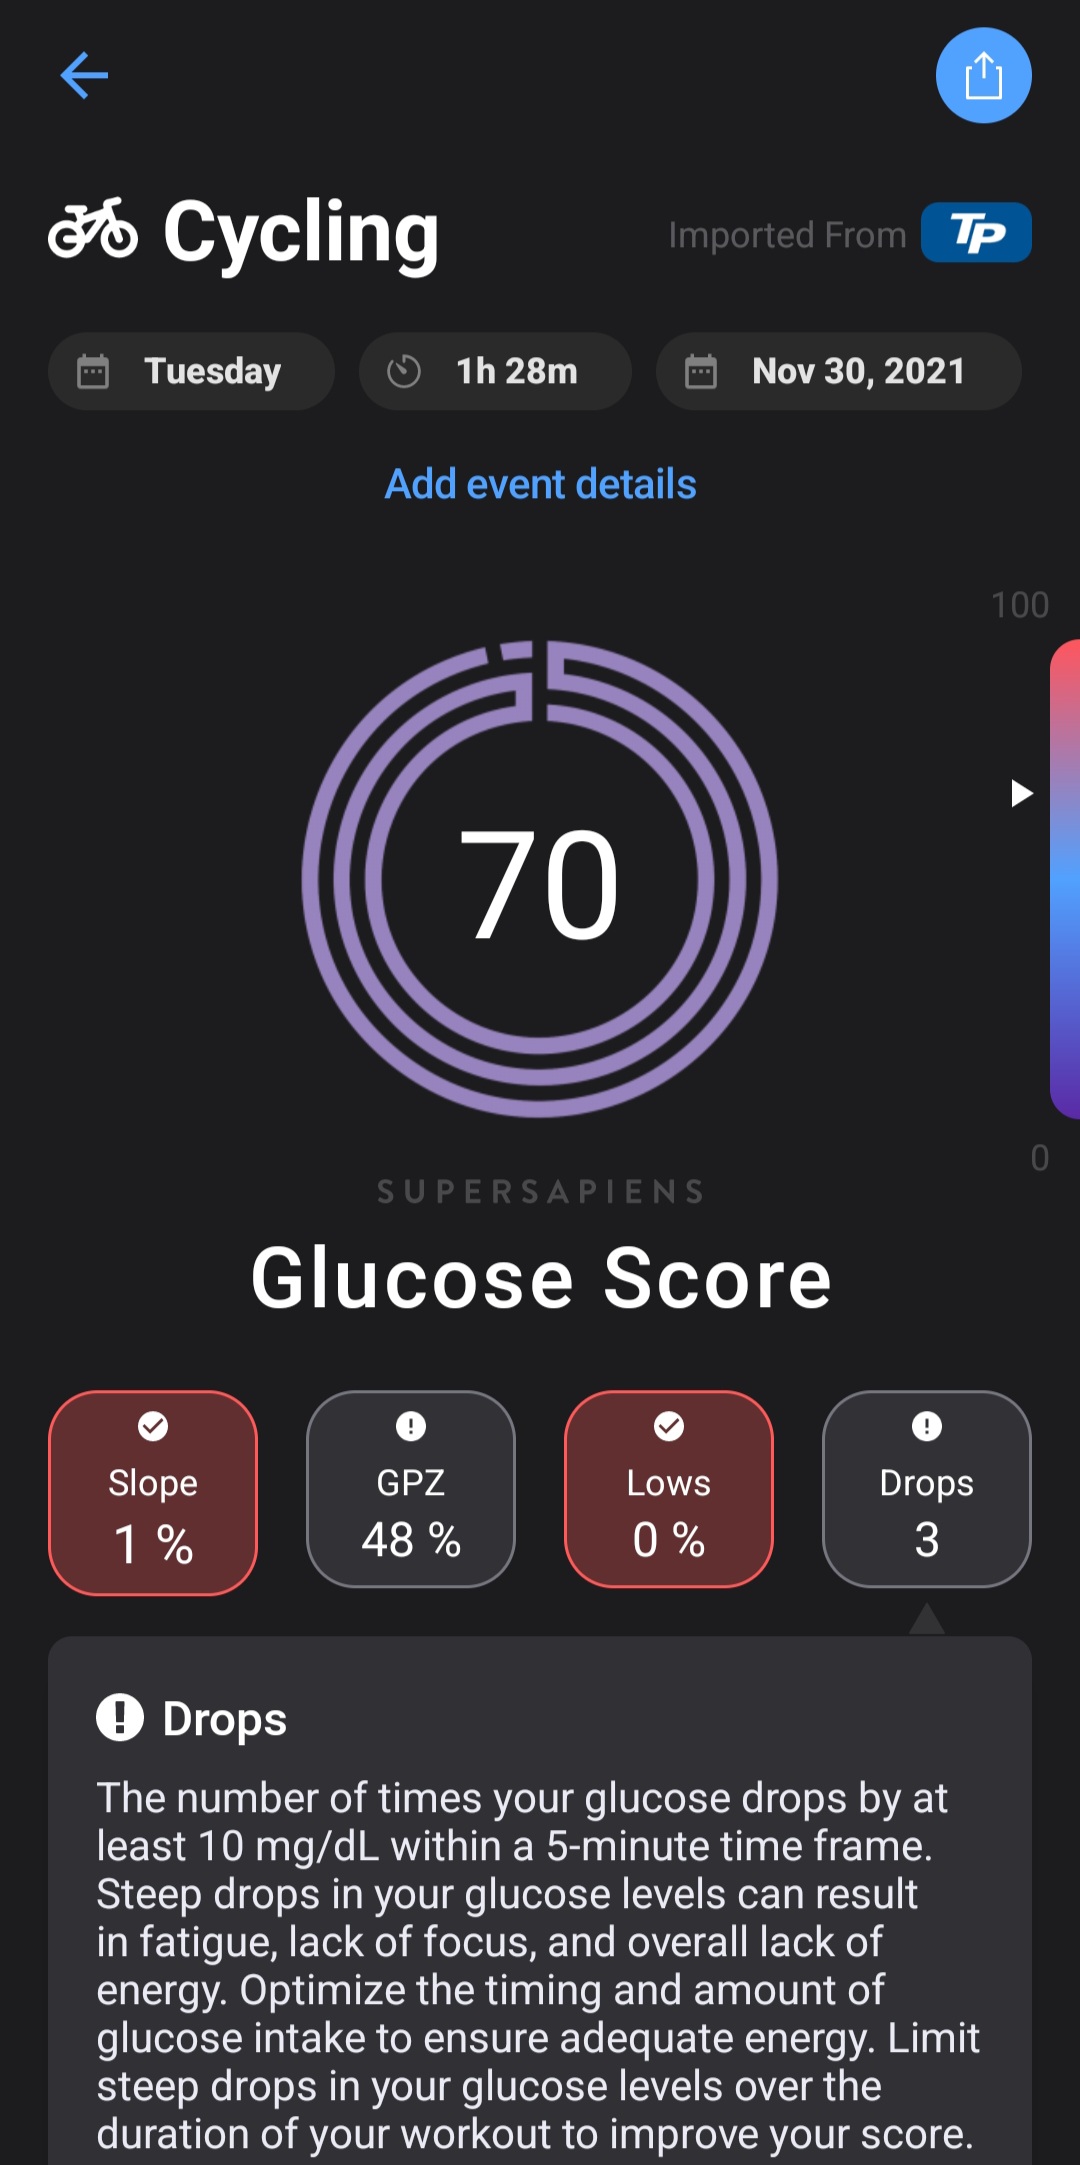
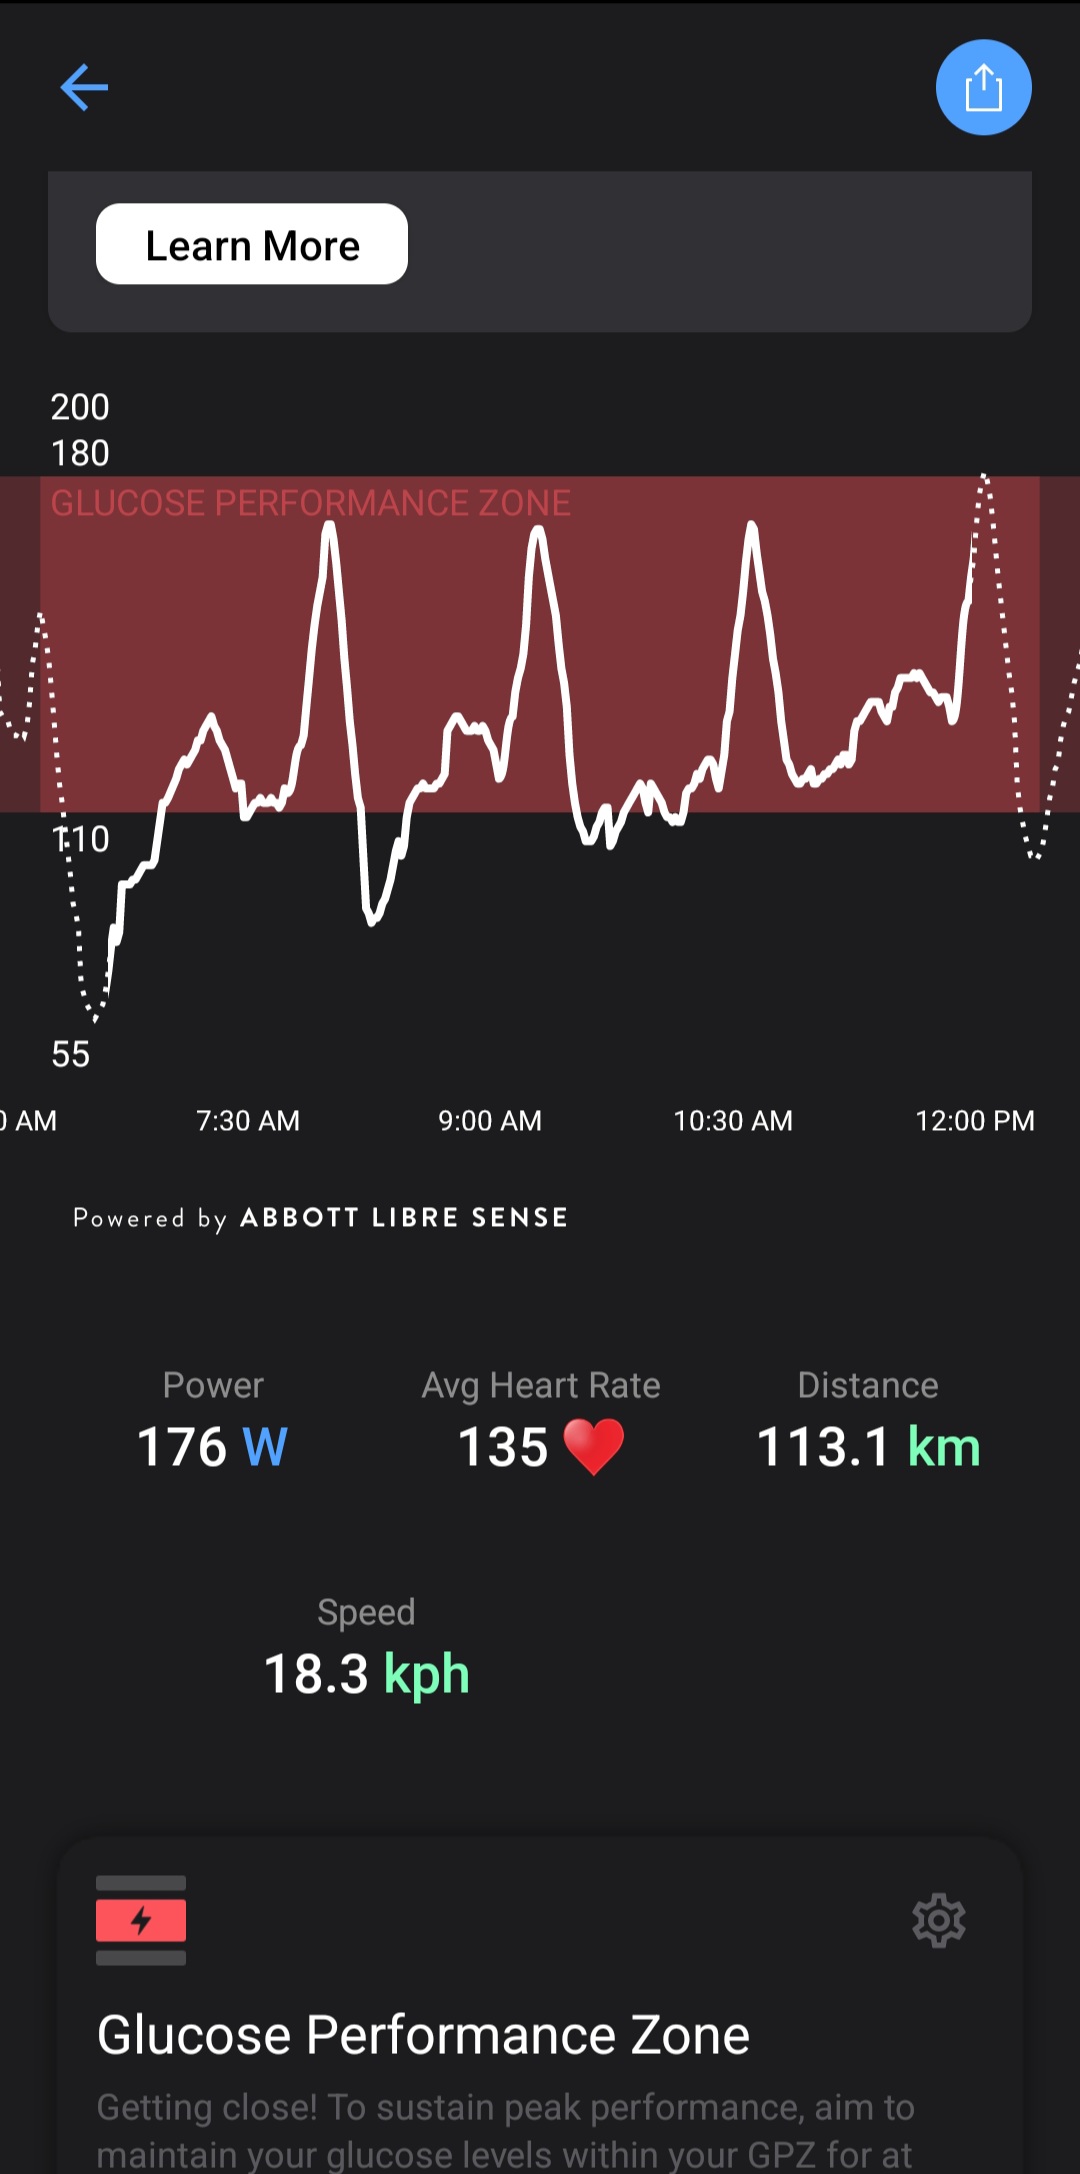
The screenshots above show the post workout data, once analysed by the app. It gives you an overview of what happened to your glucose levels during the activity – how well you stayed within the ‘performance zone’, whether you fell out of it and if your glucose levels suffered any sharp drops. The second of the two shots shows my glucose levels when taking on 4 ascents of the Alpe on Zwift. There is a slow rise as a I drank 500ml of KMC ISO Mix and a bar during the ascent. the sharp peak is when I got off the bike of the 10min descent and ate real food, like wraps, or had an Ensure shake (coincidentally also made by Abbott, who knew). In essence the data is showing you how your body reacts to the fuel you put in it – the aim being to fuel well, continuously to avoid the sharp spikes and rapid falls and therefore consistently better.
Conclusions
I want to cover what I see as some drawbacks first, they are by no means fatal and I’m sure they will change and Supersapiens will develop to overcome these.
The minor drawbacks
- Cost
- The sensors last 14 days so when you consider this over the course of a season then this data does come at a cost
- But, if you used it for A Events, intense training blocks or training camps you could enhance those periods of your season without the need for a subscription.
- So my thinking here is, like with anything we learn, so I viewed this very much as a check in and to dial in what I was already doing so while costly, I do think this has been beneficial and something I will use again.
- Integrations
- So for me the data field wasn’t compatible with my Garmin 645 or my Wahoo Roam so that was a bit disappointing as it limits how ‘live’ you can see the data beyond the app on your phone.
- The patch itself can hold 7hrs of data without syncing to your phone, after that you need to pair it or lose the data. So for those taking part in long distance events still need to carry their phone in order to make the most of the data.
- Similarly, as a coached athlete (and a trainee Coach) I’d love to be able to load my glucose data in to TrainingPeaks and get a really holistic view of my training and recovery data
- Performance patch
- So provided with the sensor is a breathable, fabric patch that sits over the top of the sensor to hold it in place. I guess it gives you a bit of extra security from knocking the sensor off. In reality, I’ve found their adhesion a bit hit and miss – this could be an issue with body hair, but some have stuck well and others start to unpeel after a day or so.
The positives
- Usability
- The app (and the sensor) as seriously easy to use and understand once set up and running. I love the design and the lay out, its clear, simple and uncluttered. The bonus is that every aspect comes with some kind of tip or learning, so you are in no doubt what you are looking at. Genuinely I could find no fault with the data or how to access and interpret it thanks to the app.
- Insight
- The big sell with this whole ecosystem is the insight it gives you and for any athlete looking to be better, then getting under the hood of your body is a fundamental part of that journey to better. I love that this can help take some of the guess work out of fuelling.
This is no wonder drug or cure to your fuelling and performance questions, but what it is, is insight and an opportunity to learn, adapt and grow as an athlete. I really believe you learn something with every ride you do and that’s the same with the glucose monitoring, using the data to learn how your body reacts to different foods and sessions and adapting the way train and fuel as a result. I’ll share more of the actual results and my learnings in another blog.
Will I continue to use Supersapiens? Yes, but not all year. For me, wearing the sensor will become part of my event preparations, 2 to 3 months out from the start line, to ensure I am preparing my body in the right way and that my pre and event fuelling is giving me the opportunity to perform at my best. I see this is a key part of my prep and plans for RAAM.
Is this right for everyone? No clearly not. As someone rightly said on my Instagram post – if you want the most bang for your buck in terms of performance gains, spend the money on a coach.
Let me know if you have any questions or comments.
